Getting Started
This guide will walk you through the basics of configuring, exporting, and using an Animated Java Rig.
First of all, you'll need to create, model, texture, and animate an Animated Java Rig!
Creating and configuring Animations is handled a little differently in Animated Java than in vanilla Blockbench. You can learn more via the Animations page.
Once you've modeled, textured, and animated your Rig, you can follow this guide to configure and export it.
Configuring the Project
Project Settings
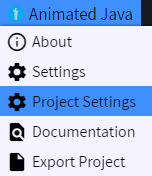
To open the Project's Settings, Click on the Animated Java Menu at the top of the screen, then click on Project Settings button.
You can get more in-depth descriptions of individual settings via the Project Settings page. But for now, let's go over the bare minimum you need to know to get started.
Below are all of the essential settings you'll need to configure in order to successfully export your Rig.
- Project Name
- This name will be used to reference the project in the exported Data Pack and Resource Pack.
- Texture Size
- Make sure the Texture Size is set to the size of the largest texture in your project.
- Rig Item
- This is the item that will be used to display your Rig in-game. It can be any item in vanilla Minecraft. However, keep in mind that some items do not support partial transparency.
- Resource Pack
- The Resource Pack that you want to export your Rig into.
Note that this setting expects a path to the
pack.mcmetafile of a Resource Pack.
- The Resource Pack that you want to export your Rig into.
Note that this setting expects a path to the
- Exporter
- The Exporter that you want to use to export your Rig. In this tutorial, we'll be using the Data Pack Exporter.
- Data Pack: Data Pack Folder
- The folder that you want to export your Data Pack into.
This should be the folder you want to put the exported Data Pack inside of.
For instance, if you wanted to put it into a Minecraft world this setting should target
.minecraft/saves/world/datapacks.
- The folder that you want to export your Data Pack into.
This should be the folder you want to put the exported Data Pack inside of.
For instance, if you wanted to put it into a Minecraft world this setting should target
Now that we've configured the Project, let's export it!
Exporting the Project
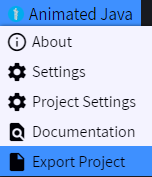
Exporting a Project is super easy. Just click on the Animated Java Menu at the top of the screen, then click on Export Project. That's it!
Using the Exported Data Pack
Now that you've exported your Rig, you can test it in-game.
Make sure you've reloaded your Resource Pack and Data Pack after exporting your Rig.
Summoning the Rig
Summoning the Rig is as easy as running the animated_java:<project_name>/summon function.
/function animated_java:<project_name>/summon
Removing a Rig
You can remove specific Rigs by executing the animated_java:<project_name>/remove/this function as the root entity of the Rig you want to remove.
/execute as @e[type=#animated_java:root,tag=aj.<project_name>.root] run function animated_java:<project_name>/remove/this
You can also remove all instances of a Rig from the world using the animated_java:<project_name>/remove/rigs function.
Or, remove all of this Rig's entities from the world using the animated_java:<project_name>/remove/all function.
The remove/all function is most useful in cases where rigs break and for whatever reason the root entity is no longer available.
Playing an Animation
You can control the playback of a Rig's animations by executing it's control functions as the root entity of the Rig.
For instance, to play the epic_dance animation you can run the animated_java:<project_name>/epic_dance/play function as the root entity of the Rig.
/execute as @e[type=#animated_java:root,tag=aj.<project_name>.root] run function animated_java:<project_name>/<animation_name>/play
Note that when you start or resume a new animation, you first need to stop any other playing animations on the Rig that affect the same bones or the animation will break.